
Meet Rubi
Rubi3 is a comprehensive, highly effective and easy to use cloud based CRM system. Rubi can be accessed via any browser that is connected to the internet enabling you to access customer information on the go.
Rubi was designed using a familiar menu and tab layout which enables most users to navigate through the system with relative ease. Once logged in, Rubi Users are able to:
- Store and manage customer records
- Log interactions with contacts
- Log Prospect, Customer and Sales tracking information
- Create customised reports with the built-in reporting tool
- Fully manage events and bookings with the built in events and booking module
- Integrate with MS Office including your Outlook Calendar and Tasks (Windows Environment Only)
- Add customised fields to track specific information
- Integrate with company website for live data tracking
- Integrate with Sage and Xero Accounting products
- Export data to existing MailChimp and ForFront subscription lists
- And more!
Note: We recommend that you use Rubi with the latest version of Internet Explorer as other browsers may not include the necessary components to connect with your Microsoft Office applications such as MS Outlook and MS Excel. A plugin is also available for users who wish to use alternative browsers within a Windows environment.
How to Log into Rubi
New Rubi Users should receive a ‘Welcome Email’ from either a CMIS-UK Representative or a designated System Administrator. The ‘Welcome Email’ includes all of the information required to successfully log into Rubi. Users who require assistance or more information about welcome emails may contact the CMIS-UK Support Team on +44 (0)113 322 6555 or at support@cmis-uk.co.uk.
When logging in to Rubi3, Users are required to enter an email address, password and key.

How to Reset Passwords
If you forget your password, simply enter your email address and key into the relevant fields. Once entered, select the ‘Reminder’ button. Once the ‘Reminder’ button has been selected Rubi will generate a new password and send this information via email.

**Please note that password reset emails may be sent to your spam/junk folders.
How to save login details
Once the email address and key have been added, Users can select the ‘Remember Me’ box. Once selected, Rubi will remember the email address and key for the account, making future logins much quicker for users. For added security Rubi does not remember passwords for any user accounts.

How to bookmark Rubi login page
By selecting the ‘Bookmark’ option within the login screen, Rubi will add the login screen link to your ‘Favourites’ within your browser.

Home Button
![]()
The ‘Home’ button is located next to the search box and enables users to navigate to the ‘Welcome Screen’ and the ‘Dashboard’ section of Rubi.
Welcome
Welcome Page
The ‘Welcome Page’ is displayed to all Rubi users after logging in. This page has an allocated space to add a company logo and includes a link to a security settings guide. The security settings guide can be used to input the required settings that enable Rubi to communicate with MS Office.

Rubi Message Page
The message page is displayed to all Rubi Users when logging into the system. This is an HTML based section that can be customised by organisations for internal communication purposes.

System Administrators can customise this area by following the steps provided below:
1. Go to the ‘System’ section and select ‘Settings’
2. Add content to the ‘Welcome Screen Message’ section and either click out of the field or select ‘tab’ on your keyboard.
Rubi Search Function
The search function is located in the top left Rubi menu bar and remains static throughout every section of the system. Users can perform ‘Quick’ and ‘Advanced’ searches to quickly retrieve records of interest.

Dynamic Search
Searches can be performed on company name, company telephone, contact name, contact telephone number, contact mobile, post code, company ID, e-mail address, previous company name and booking ID.
Quick Search
A quick search can be performed within Rubi by typing the first three characters of the record that you would like to locate within the ‘Search’ field. After the first three characters have been entered, Rubi will begin returning results in the preview panel below.

Advanced Search
Advanced searches can be performed within the same search field in order to return a more detailed view of your results. To perform an Advanced Search, simply type the characters in the search bar and select ‘Enter’ on your keyboard.

Company/Individual Records
 The ‘Records’ button is located to the right of the ‘Home’ button within the Rubi menu bar. Users can create new records or merge existing records within this section.
How to Open Records
Company records can be easily opened by selecting either the company name link or the ‘View Record’ option (as shown below).

Records can also be opened in other areas of Rubi by selecting the company name link as shown below.

Add New Records
Users can create new company or individual records by selecting the ‘New Record’ option within the drop down list for ‘Records’ as shown below.

Creating Company Records
In order to create a company record, simply enter the company name and company telephone number in the pop-out window (as shown below) and then select ‘Save’. Once the ‘Save’ option has been selected, Rubi will create the company record and direct you to the ‘General’ page of the newly created record.

Using ‘Add as Contact’ Option
The ‘Add as Contact’ option will add your new record to the system as an ‘Individual’ record rather than a ‘Company’ record. The system will also add the ‘Contact’ name to your contact’s list as part of this record.

How to Merge Records
Users can merge company records by selecting the ‘Merge Records’ option within the drop down list for ‘Records’ (as shown below). The ‘Merge Records’ option will merge two existing company records within the system.

When records are merged, the contacts, bookings, interactions, sales/pipeline, international trade documents and offers are moved to the ‘merge to’ record. If certain values are missing within the ‘merge to’ record, but exist in the ‘merge from’ record, those fields will be populate based on the data from the ‘merge from’ record.
Adding Companies to Merge
After ‘Merge Records’ has been selected, simply search for the records that you would like to merge within the ‘Merge From’ and ‘Merge To’ fields and select the ‘Save’ option. Users must also select the ‘Are you sure?’ option to complete the merge.

**Please note that the merge function is irreversible. Any records that have been merged accidentally will need to be reported to the CMIS-UK Technical Team for resolution.
How to Deactivate Records
Company records can be easily deactivated by selecting the ‘Deactivate’ button within the General box (shown below). When this option is selected, Rubi will archive the company record. Deactivated or Archived records no longer appear when performing quick searches.

How to Locate a Deactivated Record
Deactivated records can be easily located when users perform an advanced search for a specific company. By typing the name of the company and pressing ‘Enter’ on they keyboard, Rubi will perform an advanced search. Companies who are deactivated will appear within the ‘Company Deactivated’ section of an advanced search.

How to Reactivate Records
Records can be reactivated by selecting the Reactivate button at the top of the company record (shown below).

How to Amend Data
Users can easily edit fields within Rubi by clicking into the field and making the required changes. Changes are saved when users click out of the field or hit ‘tab’ on the keyboard. Rubi will flash a green bar within the field to confirm that the changes have been made and accepted.

**Please note that if Rubi flashes red, the changes have not been accepted and saved. This error can indicate a communication problem with the database server or that there is a problem updating the field to the selected value.
The General Box
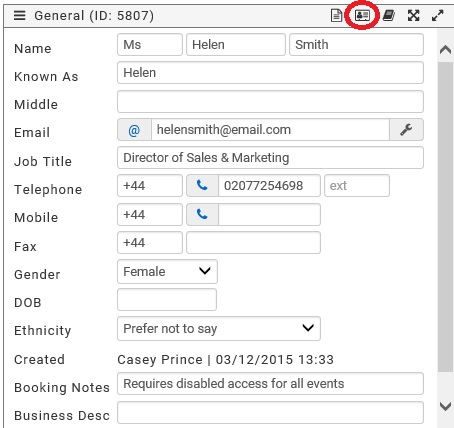
The ‘General’ section within a record contains general contact and website information to include Name, Telephone Numbers, E-Mail Address, Website, Trading As, Alternate ID, Company/Individual, Owing, Stop Credit, Created Data, Deactivate and Customised Fields.

Company/Individual Option
The Company/Individual option within the ‘General’ section enables users to designate records as either a Company or an Individual.
![]()
If a record is set as ‘Individual’, the contact listed within this record will be linked to the main contact record. Any changes made to the contact record are reflected within the ‘General’ section of the open record such as name and telephone.
Address
Address information for company records can be found in the menu bar within an open record (shown below).

Once selected, Rubi will open the address box.

Keeping Address
Users can opt for the address section to remain static (within the view) by selecting the ‘eye’ icon (shown below).

Once selected, Rubi will remember this setting and display the address information each time a record is opened. To deactivate this setting, select the ‘eye’ icon again.
Additional Address
Users can easily store more than one address for a company record. To add a Billing or Head Office address to the company record, select the + button as shown below.

Once selected, choose the preferred address type from the pop-out window drop down list. Click save to add the new address type to the company record.

Address – Map View
Users can easily access a map view of company addresses by selecting the ‘View on map’ button (shown below).

Address – Lookup
Rubi has a built-in PCA Predict Lookup feature for addresses. Users to who wish to use this service must have an active account with PCA Predict. For more information about PCA Predict click here.
Select the ‘PCA Predict Lookup’ button (shown below) to search for a company address based on post code.

Once selected, Rubi will provide a list of addresses that match the post code. Users can then select the preferred address which populates the address section for the record.
Business Information
Business information for company records can be found in the menu bar within an open record (shown below).

Within this section, users can store general information about companies such as the number of employees, business start date, turnover, status, category (or sector), SIC UK code and description.

Keeping Business
Users can opt for the Business section to remain static (within the view) by selecting the ‘eye’ icon (shown below).

Once selected, Rubi will remember this setting and display the Business information each time a record is opened. To deactivate this setting, select the ‘eye’ icon again.
Customer or Membership Information
The Customer or Membership section for company records can be found in the menu bar within an open record (shown below). Please note that this section can be displayed as ‘Customer’ or ‘Membership’ dependant upon the Rubi system settings.

Within this section, users can store information relating to Customer or Membership information such as Status, Type, Rep, Signup Rep, Joining Date, Renewal Date, Date Left, Member Number, Renewal Month, Pay Type, Amount, Source, Application Form, Logo and Classification Codes.

Keeping Customer/Membership
Users can opt for the Customer/Membership section to remain static (within the view) by selecting the ‘eye’ icon (shown below).

Affiliates
Affiliates for company records can be found in the menu bar within an open record (shown below).

This function enables users to link company records with other company records (that exist in Rubi) for tracking and reporting purposes.

Keeping Affiliates
Users can opt for the Affiliates section to remain static (within the view) by selecting the ‘eye’ icon (shown below).

Once selected, Rubi will remember this setting and display Affiliates each time a record is opened. To deactivate this setting, select the ‘eye’ icon again.
Adding Affiliations
Users can easily add affiliates to a company record by selecting the + button in the top right hand corner. Once selected, a search can be performed to locate the company record that should be linked. After the company is located, click save to add the affiliation.

Removing Affiliations
To remove an affiliation, click the ‘Remove this Affiliate’ button.
Company Uploads
The company ‘Uploads’ section can be found in the menu bar within an open record (shown below).

Users can upload a wide variety of file types against a company record. These files can then be accessed at any point by opening the company record and navigating to the uploads area. Files in this section can also be used as attachments when creating interactions for contacts.

Uploading Files
To upload a file for a contact, select the ‘Add new upload’ button in the top right hand corner of the box. The following file types can be uploaded into this section: .doc, .docx, .ppt, .pptx, .xls, .xlsx, .pdf, .png, .gif, .jpg, .jpeg, .bmp, .txt, .xps. The maximum size for each file uploaded is 10MB.
Locked Files
Files that are locked can only be deleted by a System Administrator or the user that uploaded the file.
Company Social Media
The company ‘Social Media’ section can be found in the menu bar within an open record (shown below).

Once selected, Rubi will display the social media box for the open company. Users can store URL links for various social media sites for companies by adding the address to the relevant field. Additional social media sites can be added by System Administrators by selecting the toolkit icon in the left hand corner.

Keeping Social Media
Users can opt for the Social Media section to remain static (within the view) by selecting the ‘eye’ icon (shown below).

Once selected, Rubi will remember this setting and display the company Social Media section each time a record is opened. To deactivate this setting, select the ‘eye’ icon again.
Social Media Favourites
Social media sites can be saved as favourites by ticking the ‘Favourite Social’ box next to the preferred site(s).

Once ticked, Rubi will save the social media site(s) within the user’s social media area located in the top right hand corner of the Rubi menu.

Company Interests
Company Interest information for company records can be found in the menu bar within an open record (shown below).

Users can track specific, customisable interests for companies within this section. This feature is useful for tracking particular services or other topics of interest in order to create more targeted approaches for e-marketing or other services. System Administrators can customise the interest list by selecting the toolkit icon in the top left hand corner.

Keeping Interests
Users can opt for the Interests section to remain static (within the view) by selecting the ‘eye’ icon (shown below).

Once selected, Rubi will remember this setting and display the company interests each time a record is opened. To deactivate this setting, select the ‘eye’ icon again.
Company Bookings
Users can access all bookings for a specific company by selecting the ‘Bookings’ section within an open record. The ‘Bookings’ section is located in the drop down menu of an open record (shown below).

Once selected, Rubi will display all events with existing bookings for the company (shown below).

Viewing Bookings
To view bookings for a specific event, click on the event name. Once selected, Rubi will display all bookings for the event (shown below).

Amending Existing Bookings
Existing bookings can be easily amended by ticking the box next to the booking(s) that should be changed. Once ticked, the required changes to the booking(s) may be applied.

Adding Bookings
Users can easily add bookings to an event within this section.To add a new booking, select the ‘Add new’ button (shown below).

Once selected, Rubi will redirect users to the new bookings page where additional bookings can be added for the company. Bookings can only be added for contacts who do not currently have a booking for the selected event.

Removing Bookings
Existing bookings can be easily removed by changing the bookings status to ‘Remove’ (shown below). Please note that bookings that have been removed will remain in the background for data protection purposes.

Company Sales/Pipeline
The company ‘Sales/Pipeline’ section is located in the drop down menu of an open record (shown below).

All chargeable products and services (including event bookings) are tracked within this section.

Adding New Sales/Pipeline Item(s)
New Sales/Pipeline items can be easily added by selecting the ‘Add new’ button in the top right hand corner (shown below).

Once selected, Rubi will open the new items page where users can manually log new sales/pipeline items. Please note that event bookings are automatically added to the company sales/pipeline section.
Removing Sales/Pipeline Item(s)
Sale and Pipeline items can be easily removed by ticking the box next to the preferred item(s). Once ticked, amend the ‘Status’ to ‘Remove’ (shown below).

Cloning Sales/Pipeline Items
Existing Sales/Pipeline items can be easily cloned to quickly add an additional items with the same values to then assign to another contact. To clone, select the tick box next to the preferred item and then select the ‘Clone’ button in the top right corner (shown below).

Company Offers
The company ‘Offers’ section is located in the drop down menu of an open record (shown below).

Users can track offers that customers/members have within this section.

Adding Offers
To add a new offer, select the ‘Add new’ button in the top right corner (shown below).

Once selected, Rubi will open the new items page where users can log the details of the new offer. Once added, click submit.

Amending Offers
To amend an existing offer, select the tick box next to the preferred offer and apply changes.

Disabling Offers
To disable an offer, change the expiry date to a date that is in the past. This will disable the offer and keep the information for future reference and data protection.
Cloning Offers
Existing offers can be cloned to quickly create additional offers for a company with the same values. To clone an offer, tick the box next to the offer that you would like to clone and select the ‘Clone’ button.
International Trade
The ‘International Trade’ section is located in the drop down menu of an open record (shown below).

Users can track International Trade information by country for companies within this section.

Adding International Trade Items
To add an International Trade item select the + button in the top right corner (shown below).

Once selected, search for the required country to add to the list and tick the required options.
Deleting International Trade Items
International Trade items can be easily deleted by ticking the box next to the preferred item and selecting the ‘Remove Selected’ button in the top right as shown below.

International Trade Documents
International Trade Documents can be found in the drop down menu of an open record (shown below).

Users can log International Trade documentation within this section. Items that are logged here are automatically added to the Sales/Pipeline section for the company record.

Adding International Trade Documents
Select the ‘Add new’ button in the top right to add an International Trade document to the company record (shown below).

Once selected, Rubi will open the new items page where users can log the details of the document. Once added, click submit.
Amending International Trade Documents
Documents can be easily amended by ticking the box next to the preferred document and making the changes accordingly (shown below).

Removing International Trade Documents
International Trade documents can be easily removed by changing the ‘Doc Type’ to ‘Remove’ as shown below.

Payments
Payments can be accessed within the drop down menu of an open record (shown below).

The ‘Payments’ section within a company record details all outstanding items that are due for payment (for a specific company).
**Please note that items must have a value of more than 0, a valid payment type and an accounts status of ‘To Invoice’ to appear within this section.

Processing Payments
To process payments for outstanding item(s), select the tick box next to the item(s) to be added to the customer’s basket (and include tax if required).

Complete the required fields within the basket and then select ‘Submit’ to process payment for the selected item(s).
**Please note that Rubi must contain SagePay or RealEx settings in order to complete card payments.

Viewing Actioned Payments
Users can easily view actioned payment items by selecting the ‘Actioned’ button within ‘Payments’.
Company Audit Information
The ‘Audit’ section can be accessed within the drop down menu of a company record (shown below).

The Audit function records and displays any changes made to a company or contact record.

Viewing Changes
To view changes to a record, enter a date range and click the ‘Apply’ button to see the audit. Once selected, Rubi will display an audit trail of any changes that have been made to include the fields that have been updated and the name of the person who made the change(s).
**Please note that Rubi can only return audit results for a date range of up to 60 days.

Contacts Box
All contacts associated with the open record are displayed to the right of the General box (shown below). Main contacts for records are listed at the top with a green dot next to the contact name. All other contacts are listed in alphabetical order by first name.

Adding Contacts
To add a new contact, simply select the ‘Add new contact’ button as shown below.

Once the ‘Add new contact’ button has been selected, simply enter the basic contact information in the pop-up window as shown below and click save.

Contacts can also be added by using the ‘Add New Contact’ button in the top right hand corner of a record (shown below).

Removing or Deleting Contacts
Designated Rubi System Administrators can tidy up contact lists by removing or fully deleting any unwanted contacts from the system. Contacts that are removed will retain data in the background that is not visible to users. Contacts that are deleted, are fully deleted from Rubi and this action is irreversible.
Removing Contacts
Removing contacts is a great way to tidy up contact lists within company records. If you have a long list of staff who are marked as “Left”, you can easily remove those contacts whilst still retaining the historical data.
To remove a contact record, change the surname of the contact that you would like to remove to “Remove”.

Deleting Contacts
Contacts that are deleted from Rubi are fully erased from your organisation’s database. This action will delete the entire contact record and any data associated with the contact.
IMPORTANT: This action is irreversible and will fully delete the contact record and any data associated from your database.
To fully delete a contact record, change the surname of the contact that you would like to delete to **ERASURE**

Viewing Contacts
Users can view contacts by clicking a contact name from the list. Once selected, Rubi will open the contacts page as shown below.

Contacts and vCards
Users can quickly add a contact directly to MS Outlook Contacts or other applications by selecting the vCard button as shown below.
Once selected, Rubi will open the vCard file which can be saved for Outlook Contacts or other applications.
Generating Templates for Contacts
Users can easily generate a personalised message to an individual contact using the ‘Generate Template’ button as shown below. This action will direct users to the ‘Interactions’ area so that a pre-existing template can be selected and sent in the preferred manner. For more information please visit the ‘Interactions’ section of this guide.

Editing Contact Address
Users can view/amend the address information for specific contacts by selecting the ‘Address’ option within the Contacts Admin section as shown below.

Once selected, Rubi will display the address box for the open contact. Users have the ability to edit the address for contacts in this section. Additional addresses for contacts may also be added by selecting the ‘+’ button.

Contact Email Address
Users can add/amend individual contact email addresses within the Contact Admin area by selecting the ‘Email’ option as shown below.

Once selected, Rubi will open a new window as shown below that includes the email addresses listed for the selected contact. Current email addresses may be amended in this section and additional email addresses may be added.

Primary Email Address
The Primary email address is the address used when running reports for contact information. For example, if you run a report with ‘Contact Email’ as an output column, the primary email address will be returned in your results.
For Customers who have Rubi linked to their company website, the Primary email addresses is also used when your contact is signing into your website. To assign a Primary email address for a contact, tick the ‘Primary?’ box next to the preferred email address as shown below.

Contact Type
Users can assign ‘Contact Types’ to individual contact records. This list is fully customisable and reports can be built to return contacts with specific types. To open the Contact Type section for a contact, simply select the ‘Type’ option within a contact record (shown below).

Once selected, Rubi will open a new window (shown below) that includes the Contact Types listed for the selected contact. New types can be added/removed in this section.

Contact Uploads
Users can upload a wide variety of documents against a contact record. The ‘Uploads’ section can be found in the menu bar within an open contact record (shown below).

Once selected, Rubi will open the uploads box for the open contact (shown below).

Uploading Files
To upload a file for a contact, select the ‘Add new upload’ button in the top right hand corner of the box. The following file types can be uploaded into this section: .doc, .docx, .ppt, .pptx, .xls, .xlsx, .pdf, .png, .gif, .jpg, .jpeg, .bmp, .txt, .xps. The maximum size for each file uploaded is 10MB. Files that are uploaded into this section can be used as attachments when creating interactions and accessed within the contact record.
Contact Social Media Sites
Users can track social media sites for individual contacts by selecting the ‘Social’ button (shown below) within a contact record.

Once selected, Rubi will open the social media links for the contact. Users can track various social media sites by adding the URL into the appropriate field(s). Favourite social media sites can be saved as favourites by ticking the ‘Favourite Social’ box.

Contact Interests
Specific interests can be assigned to individual contacts for reporting purposes and this area is fully customisable to suit the needs of your organisation. To access contact interests, select the ‘Interests’ button (shown below) within an open contact record.

Once selected, Rubi will open the Interests box for the open contact. Specific interests can then be assigned to individual contacts for reporting purposes. Each interest has a communication preference that can be assigned. Users can specify specific interests and how the contact prefers receive information relating to the interest (email, mail and tel).

**Reports can be generated based on contact interests which provides a more targeted approach for e-marketing campaigns.
Contact Interactions
Interactions for a specific contact can be accessed by selecting the ‘Interactions’ option (shown below) within an open contact record.

Once selected, Rubi will open the interactions page for the company record and only display interactions for the open contact.

Contact Bookings
Users can view event bookings for specific contacts by selecting ‘Bookings’ within an open record (shown below).

Once selected, Rubi will open the bookings page for the company record and only display bookings for the selected contact.

Amending Contact Bookings
Users can amend bookings in this section by selecting the event name. Once the event is selected, Rubi will open the bookings which can then be amended as required.

**Bookings may also be amended within the events module.
Contact Sales/Pipeline
Users can access a contact’s individual Sales/Pipeline activity by selecting the ‘Sales/Pipeline’ button (shown below) within an open contact record.

Once selected, Rubi will open the Sales/Pipeline section for the company and only displays the sales-pipeline activity for the open contact.

Interactions
Interactions are tracked at the company and individual contact levels and can be accessed in many parts of the Rubi system. Interactions enable users to track communications for companies and individuals and include e-mail, telephone, in-person and mail correspondence.
Interactions Summary
A summary of interactions for a company record is listed to the right of the ‘Contacts’ section in a company record (shown below). The interactions are listed in chronological order with the most recent interaction located at the top.

How to View Interactions
Viewing Interactions – Interactions Summary
Interactions can be viewed within the interactions summary of an open company record. To view an interaction, simply click the preferred interaction and the details of the interaction will be displayed.

Viewing Interactions – Contact Record
Interactions for specific contacts can be viewed within an open contact record. To view interactions for a specific contact, click the ‘Interactions’ button as shown below.

Viewing Interactions – Company
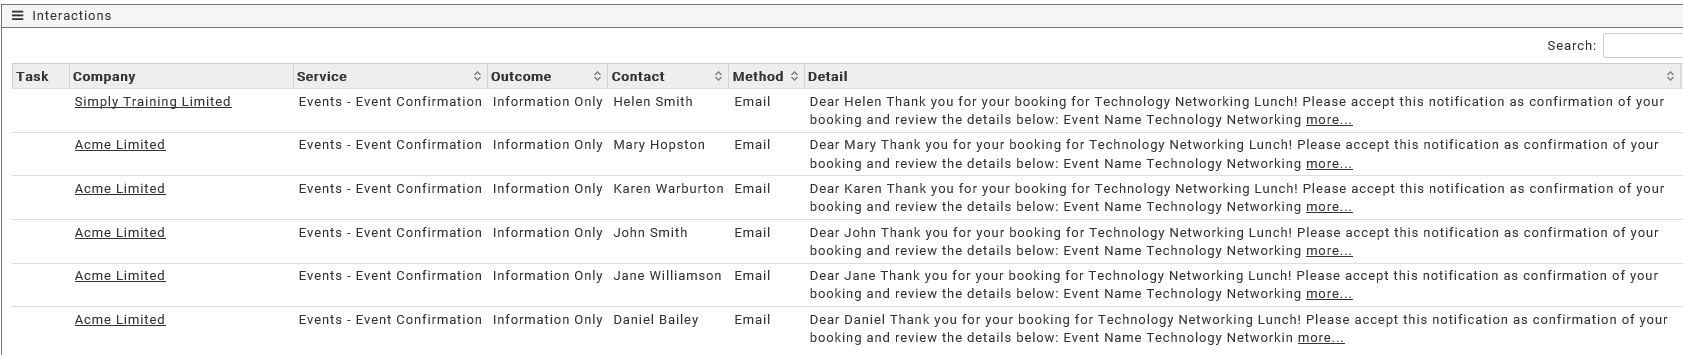
Interactions for all contacts can be viewed by selecting the ‘Interactions’ options in the drop down menu of a company record (shown below).

Once selected, Rubi will open the interactions page for the company and display previously logged interactions in chronological order.

How to Add Interactions
Add Interactions – Quick Search
The quickest way to add an interaction for a contact is via the Quick Search results. Simply type the name of the person that you would like to add an interaction for within the search box. Rubi will return the results in the Quick View section to include the contact name and company name. To add a new interaction for the contact, click the ‘Add New Interaction’ button as shown below.

Once selected, Rubi will open the interactions page for the company and populate the ‘Contact’ field with the chosen contact.

Adding Interactions – Rubi Menu
Users can also add interactions for contacts by using the ‘Add New Interaction’ button within an open company record (shown below).

Once selected, Rubi will open the interactions page for the company.
Adding Interactions – Interactions Summary
Users can also add interactions for contacts by using the ‘Add New Interaction’ button within the interactions summary box of an open company record (shown below).

Once selected, Rubi will open the interactions page for the company.
Deleting Interactions
Users who have System Administrator access can delete interactions that have been previously logged. To delete an interaction, go to the interactions page within the company record (shown below).

Once selected, Rubi will display all of the interactions that have been logged for the company in chronological order. Tick the interaction(s) to be deleted and then select the ‘Remove Selected Items’ icon in the top right hand corner.

How to Log Basic Interactions
To log a basic interaction, simply add the notes for the interaction, select options and then click the ‘Submit Interaction’ button.

Once submitted, Rubi will log the interaction and redirect users to the ‘Interactions’ page of the company record.
How to Log Interactions with Task (Reminder)
Interactions that require a follow-up can be logged with a task (reminder). To set a task as part of an interaction simply add a date/time, reason and priority into the ‘Task/Alert’ section (shown below). After the task/alert section has been completed, click the ‘Submit Interaction’ button.

Once submitted, Rubi will log the interaction and open a pop out window with additional options. Users (working in a Windows environment) now have the option to add the task/reminder to Outlook Calendar, Outlook Task List or both.

Once the task has been set in Outlook, Rubi will direct users to the interactions page for the company and display the interaction with a green bell.

The interaction will also be highlighted in green in the interactions summary box until the task is marked as complete.

Tasks set for Rubi Users are displayed in the ‘Task’ section in the top right hand corner of the Rubi Menu. Users can view upcoming tasks and mark them as complete within this section.

How to Log Interactions with Alerts for Other Staff
Interactions can be added with an alert to be sent to other staff members (who are also Rubi Users). To create an alert, add the name of the staff member that should receive the alert into the ‘User’ box as shown below. Users can also CC other staff members into the alert in the same manner within the CC field.

Once entered, select the ‘Submit Interaction’ button to log the interaction and send the alert. Once logged, Rubi will redirect users to the interactions page for the company and display the interaction with an exclamation point. Rubi will also email the user who is due to receive the alert and add the task to the recipient’s task list.

The logged interaction will remain highlighted in green until the recipient marks this as complete.

Sending Emails as Interactions
To send an email interaction select the ‘Email Interaction’ button in the top corner of the notes section (shown below).

Users can also select ‘Email’ from the ‘Method’ drop down list to perform this action.

After the email method is selected, Rubi will display the notes section in an email format similar to MS Outlook (shown below). When a contact name has been selected from the ‘Contact’ list, the email address will appear in the ‘To’ field.

Adding Attachments
Files that have been added to the Documents folder, Company Uploads and Contact Uploads can be attached to email interactions. To attach files, select the ‘Attachments’ button and locate the preferred file(s).

Selecting Templates
Templates can be used to populate the notes field for the email that is being generated. To add a template to the email, select the template name from the ‘Template’ drop down list (shown below).

**Please note that a contact name must exist in the options list before templates can be selected.
Sending Email Interactions
When the email is drafted and attachments are in place, click the ‘Submit Interaction’ button. Once selected, Rubi will confirm that the interaction has been submitted. Users can now send the email by selecting the ‘Send by Outlook Email’ (shown below) or ‘Send by Email’ button.

Once selected, Rubi will open the email in MS Outlook which can then be sent. Emails will automatically be sent for users who do not have Rubi integrated with MS Outlook and have alternative email settings in place.
How to Import Emails as Interactions
Users who are accessing Rubi in a Windows environment in Internet Explorer (version 10 or higher) can import e-mails that have been received as an interaction. To import an e-mail, simply select the interaction method as ‘Email’ as shown below.

Once selected, click the ‘Import from Outlook Inbox’ button as shown below.

Once selected, Rubi will open a list of emails that currently exist within the user’s Outlook Inbox (shown below).

Users can now preview the message(s) within the Inbox by hovering over the ‘eye’ icon. Once the preferred email is located, users can import the email by selecting the ‘import’ button.
**Users who prefer to access Rubi in browsers outside of Internet Explorer will require the Rubi Outlook Plugin to access emails. Click here for more information about the Rubi Outlook Plugin.
Rubi Outlook Plugin
The Rubi Outlook plugin enables users (working in a Windows Environment) to access Outlook within browsers outside of Internet Explorer.
Once connected, the plugin will enable users to:
- Send emails as part of an interaction from Rubi to Outlook
- Import emails from Outlook to a Rubi Interaction allowing addition of extra notes
- Export emails as an interaction directly from Outlook
- Open an email in Outlook to view basic Company information held in Rubi relating to the email sender/recipient
Please click here for more information about the Rubi Outlook Plugin.
**Please note that there is an additional charge for users who wish to use the Rubi Outlook Plugin. Please contact the CMIS-UK Support Team for more information about the plugin at +44 (0)113 322 6555 or support@cmis-uk.co.uk
Events
 The ‘Events’ button is located next to the ‘Records’ button in the Rubi menu and enables users to create new events, view events and view the venue schedule
Adding Events
Adding New Events
To create a event new record, select the ‘New Record’ option within the Events drop down list (shown below).

Once selected, enter the name of the new event as well as the start date and then select ‘Save’.

Once saved, Rubi will navigate users to the new event record and populate the Event Name and Date fields as shown below.

Events General
The General section within an open event record contains basic information relating to the event.

Name
The Event name field tracks the name of the event and can be edited by users with the appropriate permissions.
Status
Event status enables users to mark the event as Active, Cancelled, Completed or Pending. This list is fully customisable and can be amended by System Administrators by selecting the toolkit icon. For more information on managing system lists click here.
Start Date/Time
Users can select the start date and time for the event by using this feature. Please note that times should be entered in a 24 hour clock format.
End Date/Time
Users can select the end date and time for the event by using this feature. Please note that times should be entered in a 24 hour clock format.
Type
The Event Type field is fully customisable and can be amended by System Administrators by selecting the toolkit icon. For more information on managing system lists click here.
Theme
The Event Theme field is fully customisable and can be amended by System Administrators by selecting the toolkit icon.
Course Code
The Course Code section enables users to assign specific course codes for events.
Max Company
The maximum per company field enables users to specify how many bookings are allowed per company. This is a mandatory field which must be completed in order to accept bookings for the event.
Max Attendees
The maximum attendees field enables users to specify how many total bookings can be accepted for the event. This is a mandatory field which must be completed in order to accept bookings.
Min Attendees
The Min Attendees field enables users to specify how many bookings in total are required to run the event.
Customisable Fields
Users can add additional customised fields within the general area of events in order to track additional information. This list is fully customisable and can be amended by System Administrators by selecting the toolkit icon. For more information on managing system lists click here.
Event Price
Event Prices can be found to the right of the ‘General’ section within an event record (shown below). Within the pricing section, users can specify currency, tax rates and price types.

Updating Price Types
Pre-existing price types will automatically load as ‘inactive’ when an event is added to the Rubi system. To choose a price type, simply mark the price type as ‘Active’ and enter the required price. Users can also specify if there are any savings associated with price types. Price types that are not marked as ‘Active’ will not appear as an option when creating bookings.

Additional Price Types
System Administrators can easily add additional price types for events by selecting the toolkit icon (shown below).

Event Location
Locations for event records can be found in the menu bar within an open record (shown below).

Once selected, Rubi will open the event location box (shown below).

Keeping Event Location
Users can opt for the event location section to remain static (within the view) by selecting the ‘eye’ icon (shown below).

Adding Event Locations
To add an event location, select the ‘Update location’ button in the top right as shown below.

Once selected, Rubi will navigate users to the locations area. The locations area provides a list of all previously used event locations. To choose an existing location from the list, click the ‘Select’ button and Rubi will add the details to your event.

To add a new address to the list, search for the company name and select the ‘Add’ button when complete. Please note that only companies that have been loaded into the Rubi system will appear within this search.

Event Notes
Notes for event records can be found in the menu bar within an open record as shown below. The event notes section provides users with a space to log internal notes about a specific event.

When the ‘Notes’ option has been selected, Rubi will open the box as shown below.

Keeping Event Notes
Users can opt for the event notes section to remain static (within the view) by selecting the ‘eye’ icon (shown below).

Adding/Removing Notes
Users can easily add notes for events by typing into the notes box. To remove notes, simply delete unwanted text within this section.
Web for Events
‘Web’ for event records can be found in the menu bar within an open event record (shown below). The Web section within event records allows users to control display settings for company websites and provides website views, bookings and values.
**Please note that this functionality is only available for CMIS-UK Customers who have integrated Rubi with a website.

Once selected, Rubi will open the web information for the event (shown below).

Keeping Web Information
Users can opt for the web information section to remain static (within the view) by selecting the ‘eye’ icon (shown below).

Display on Web
When this option is selected, Rubi will display the event on the designated company website. When this option is unticked, the event will no longer be displayed on the website.
Book Online
When this option is selected, Rubi will accept bookings for the event via the website. When this option is un-ticked, bookings will not be accepted via the website.
Allow Waitlist
If the allow waitlist option is ticked additional ‘Waitlisted’ bookings can be created if the event is full. Waitlisted bookings can then be converted to active bookings if space becomes available.
Allow View Attendees
If the allow view attendees option is ticked, attendees will have the ability to view other attendees via the Event Check In portal. Click here for more information about Event Check In.
Web Image
Images for events can be set and displayed on websites by adding the URL for the image within this section.
Web Views
Web views will provide users with a live count of how many views the event has received via the website.
Web Bookings
Web bookings will provide users with a live count of the total amount of bookings received for the event via the website.
Web Value
Web value will provide users with the total value of web bookings for the event.
Accounts for Events
Accounts for event records can be found in the menu bar within an open record (shown below). The Accounts function within event records enables users to track nominal, department and products codes for events.

Once selected, Rubi will open the Accounts information for the event (shown below).

Keeping Accounts
Users can opt for the Accounts section to remain static (within the view) by selecting the ‘eye’ icon (shown below).

Nominal, Department and Product codes can be added within this section by selecting from the drop down lists. Click here for more information on how to manage system lists.
Sponsors for Events
Sponsors for event records can be found in the menu bar within an open record (shown below). The Sponsors section within an event record enables users to track specific sponsors for events.

Once selected, Rubi will open the Sponsor information for the event (shown below).

Keeping Sponsor
Users can opt for the Sponsor section to remain static (within the view) by selecting the ‘eye’ icon (shown below).

Adding Sponsors
To add sponsors for events, select the ‘Add new sponsor’ button as shown below.

Once selected, users can search for the company and contact as shown below. Please note that only companies that exist as a record within Rubi will be returned in search results. When the company and contact for the sponsorship has been located, click save.

Once saved, Rubi will add the sponsor information to the event and display the it within the ‘Sponsor’ section as shown below. Multiple sponsors for events can be added and users can assign a value for the sponsorship(s) and the order in which they are to be displayed on the website. Users can also add notes relating to each sponsorship within the ‘Details section.

Removing Sponsors
To remove a Sponsor, simply untick the ‘Active’ button on the right side of the window as shown below.

Presenter for Events
Presenter for event records can be found in the menu bar within an open record (shown below). The Presenter section within an event record enables users to track specific presenters for events.

Once selected, Rubi will open the Presenter information for the event (shown below).

Keeping Presenter
Users can opt for the Presenter section to remain static (within the view) by selecting the ‘eye’ icon (shown below).

Adding Presenters
To add Presenters for events, select the ‘Add new presenter’ button as shown below.

Once selected, users can search for the company and contact (shown below). Please note that only companies that exist as a record within Rubi will be returned in search results. When the company and contact for the presenter has been located, click save.

Once saved, Rubi will add the presenter information to the event and display the it within the ‘Presenter’ section as shown below. Multiple presenters for events can be added and users can assign a value for the presenter(s) and the order in which they are to be displayed on the website. Users can also add notes relating to each presenter within the ‘Details’ section.

Removing Presenters
To remove a Presenter, simply un-tick the ‘Active’ button on the right side of the window as shown below.

Equipment for Events
‘Equipment’ for event records can be found in the menu bar within an open record (shown below). The Equipment section within an event record enables users to track items that are required to host the event. This area is fully customisable to meet the needs of your organisation. For more information on how to manage system lists, please click here.

Once the ‘Equipment’ option has been selected, Rubi will open this information in a new window or ‘box’ within the general area as shown below.

Keeping Equipment
Users can opt for the Equipment section to remain static (within the view) by selecting the ‘eye’ icon (shown below).

Activating Equipment Items
To activate an Equipment item, select the ‘No’ button next to the item required for the event. Once selected, Rubi will display the item in green with the word ‘Yes’.

Reports can be run to include the equipment items for events. For more information on creating reports please click here.
Uploads for Events
The event ‘Uploads’ section can be found in the menu bar within an open record (shown below).

Users can upload a wide variety of file types against an event record. These files can then be accessed at any point by opening the event record and navigating to the uploads area.

Uploading Files
To upload a file for an event, select the ‘Add new upload’ button in the top right hand corner of the box. The following file types can be uploaded into this section: .doc, .docx, .ppt, .pptx, .xls, .xlsx, .pdf, .png, .gif, .jpg, .jpeg, .bmp, .txt, .xps. The maximum size for each file uploaded is 10MB.

Locked Files
Files that are locked can only be deleted by a System Administrator or the user that uploaded the file.
Catering for Events
Catering for event records can be found in the menu bar within an open record (shown below). The Catering section within an event record enables users to track specific catering contracts and suppliers.

Once selected, Rubi will open the Catering information for the event (shown below).

Keeping Catering
Users can opt for the Catering section to remain static (within the view) by selecting the ‘eye’ icon (shown below).

Adding Catering Information
To add catering information for events, select the ‘Add new caterer’ button as shown below.

Once selected, users can search for the company and contact as shown below. Please note that only companies that exist as a record within Rubi will be returned in search results. When the company and contact for the catering contract has been located, click save.

Once saved, Rubi will add the catering information to the event and display it within the ‘Catering’ section as shown below. Multiple caterers for events can be added and users can assign a value for the contracts. Users can also add notes relating to each caterer within the ‘Details section.

Removing Caterers
To remove a Caterer, simply untick the ‘Active’ button on the right side of the window as shown below.

Marketing for Events
Marketing for event records can be found in the menu bar within an open record (shown below). The marketing section within an event record enables users to track the marketing methods used to promote an upcoming event.

Once selected, Rubi will open the Marketing information for the event (shown below).

Keeping Marketing
Users can opt for the Marketing section to remain static (within the view) by selecting the ‘eye’ icon (shown below).

Activating Marketing Items
To activate marketing items select the ‘No’ button next to the item that you would like to add for the event. Once selected, Rubi will display your item in green with the word ‘Yes’. This information can be used to build reports to see which methods were most successful.

Interests for Events
Interests for event records can be found in the menu bar within an open record (shown below). Users can assign specific interests for an event in order to match the event with potential attendees. For example, if your organisation is tracking ‘Networking’ as an interest for individual contacts, ‘Networking’ can be adding as an active ‘Interest’ for the event.

Once interests is selected, Rubi will open the Interests information for the event (shown below).

Keeping Interests
Users can opt for the Interests section to remain static (within the view) by selecting the ‘eye’ icon (shown below).

Activating Interest Items
To activate ‘Interests’ for an event, select the ‘No’ button next to the item that you would like to add. Once selected, Rubi will display your item in green with the word ‘Yes’. Please note that the interest must exist within the contact interest system list in order to be displayed in this section. Click here for more information about contact interests.

Quick Event Interest Report
Once the interest(s) is set for an event, users can quickly run a report to view potential attendees who have a matching interest. To quickly run the interest report, select the ‘Export to Excel’ option as shown below.

When the report has been exported to Excel, users can use then use this information to send targeting marketing campaigns to advertise specific events based on contact interests.nterests
Linked Events
Events that are scheduled to run sporadically over a period of time can be linked to other events. Links for event records can be found in the menu bar within an open record (shown below).

Example: If you have a course that begins in October and runs one day per month until February, linked events can be added with various start/end times, locations, notes and presenters. Once added, the linked events will appear in the Event schedule and the main event within ‘Links’.
Adding Linked Events
Before linked events can be added, the main event should be created as normal. Once added, users can add linked event dates by selecting ‘Links’ option from the main event record. Once selected, Rubi will open the links section as shown below. Select the ‘New Linked Event’ option.

To add a new link for an event, select the ‘New Linked Event’ option. Once selected, Rubi will open a pop-out window where multiple linked dates can be added.

Event Check-In
The Event Check-In feature can generate unique Organiser and Attendee E-Links. The E-Links generated by Check-In can then be used by the organiser and/or the attendees in order to provide a more interactive experience on the day of the event. All changes made through the check-in e-links are tracked in real time within Rubi.
Event Check-In can be found in the menu bar within an open record (shown below).

Once Check-In is selected, Rubi will open the section for the event (shown below).

Organiser E-Links
Event Check-In can generate a unique ‘Organiser E-Link’ for events which is emailed directly to the person that requests the link. Organiser E-Links can then be used on-site at events to:
- View attendees
- View booking notes
- View table numbers
- Update booking statuses
- Add bookings
- Upload attendee photos
**Please note that Organiser E-Links are unique to the user that has requested the link and should not be shared with any other members of staff or attendees.
Requesting Organiser E-Links
To request an Organiser E-Link for an event, simply select the Organiser E-Link button as shown below. Once selected, the Organiser E-link will be emailed directly to the user that has requested the link.

Using Organiser E-Links
Once the Organiser E-Link has been received, simply click the link to open and all attendees for the event will be displayed.

Updating Booking Statuses
To update an attendee’s booking status, simply select the ‘Active’ button as shown below and select the appropriate status for that booking.

Adding New Bookings
To add new bookings via the Organiser E-Link, simply select the ‘Add New Booking’ button located in the top right hand corner of the Organiser E-link page and follow the prompts.

Uploading Photos for Attendees
Organisers can easily upload photos for attendees by selecting the contact’s image icon (shown below). Once selected, the photo can be uploaded and the new photo will also be added to the Rubi contact profile.

Attendee E-Links
Event Check-In can generate a unique ‘Attendee E-Link’ for each person that is scheduled to attend the event.
Attendee E-Links are unique to each attendee and can be used to:
- View other attendees
- View ‘Check-In’ status for other attendees in real time
- View attendee photos
- View attendee table numbers
- Upload profile photos
- Provide ratings & feedback
- View event location map
Sending Attendee E-Links (Template)
Attendee E-Links are normally sent to attendees as part of a booking confirmation when a booking is sumbitted. Attendee E-Links can be sent to attendees as part of a booking confirmation by adding the merge field #BookingQR# within the template. More information about managing templates can be found here.

Sending Attendee E-Links (Organiser E-Link)
Attendee E-Links can also be sent via the Organiser E-Link page by selecting the ‘Send E-Link’ button as shown below.

Using Attendee E-Links
When attendees click on the unique link, their profile will be highlighted in green (shown below). Attendees can then submit a rating for the event and upload a new contact photo against their profile. In addition, attendees will have the ability to view other attendee profiles (highlighted in blue) to include name, company name, job title and check in status in real time.

Scheduled Emails for Events
Emails for events can be found in the menu bar within an open record (shown below). The email function within event records enables users to schedule emails to be automatically sent attendees with specific booking statuses. Click here to watch a video demonstration of the Event Email Scheduler.

Once Emails has been selected, Rubi will open the email section for the event (shown below).

Setting Up Automatic Emails for Bookings
To set up a new email to be sent automatically select the ‘Add New Email’ button as shown below.

Once selected, Rubi will open the email scheduler.

From this point, users should select the template, email, date/time to send and booking status. When all of the items have been added, click save to set up the email schedule.
Please note that multiple booking statuses can be selected in the scheduler. For more information about setting up templates please click here.

Once saved, Rubi will display the email schedule within the emails section as shown below. To set up multiple scheduled emails, follow the same process.

Removing Scheduled Emails
To remove scheduled emails for an event, select the ‘Remove Scheduled Email’ button as shown below.

Event Bookings
The Bookings section for event records can be found in the drop down list within an open record as shown below.

Once selected, Rubi will direct users to the bookings page for the event.

Adding Bookings to Events
Users can easily add bookings to an event by clicking the + button in the top right hand corner of the bookings page (shown below).

Once selected, Rubi will navigate users to the bookings page. To add new bookings, search for the company record and select the preferred organisation. Once selected, Rubi will display all contacts that are linked to the company. If a contact is not appearing in the list, he/she may need to be added as a contact.

Choose the attendee(s) that are due to attend the event by ticking the box next to the preferred name(s). Once selected, complete the options on the right hand side and click submit. Once the bookings are added, Rubi will direct users to the Bookings page and display all existing bookings for the event.
Booked By
The Booked By field enables users to specify which contact has made the booking(s) for an event.
Status
Users can assign a booking status for the new booking(s) by selecting from the drop down list. This list is fully customisable to suit the needs of your organisation.
Price Type
Users can assign a booking ‘price type’ such as ‘Member Rate’ within this field. Price types for events are created when the event is initially added to the Rubi system.
Price
The Price field will automatically populate with the correct value when the price type has been when selected.
Source
The source field enables users to track information in relation to how the customer/member discovered your event. For example, if you have advertised your event in a local paper, you can specify the source within this area. The source list field is customisable to suit the needs of your organisation.
Booking Category
The booking category area can be used to add additional category types to event bookings. This list is fully customisable to meet the needs of your organisation.
Special Requests
The special requests area is a free text section that enables users to add additional requests to bookings.
Booking Notes
The booking notes area is a free text section that enables users to create additional notes regarding the booking.
Table #
Users can assign a specific table for bookings by entering the table number within this section.
Extra Notes
Extra notes is a free text area that enables users to add additional notes to bookings.
Guest Of
The ‘Guest Of’ function enables users to create bookings that to be paid for by another company. To set a ‘Guest Of’ value, search for the company record and add as required.
PO#
The PO # section enables users to enter purchase order numbers as required.
Payment Type The Payment Type section enables user to specify how bookings payments are to be processed. For example, if an invoice needs to be generated for the booking(s), set the payment type as ‘Invoice’. This list is fully customisable to suit the needs of your organisation.
Accounts Status
The Accounts status area enables users to select the current payment status of a booking such as ‘paid’, ‘invoiced’ etc. Please note that bookings that do not have an Accounts status of ‘To Invoice’ will not appear in the payments section of a company record. This list is fully customisable to suit the needs of your organisation.
Amending Existing Bookings
To amend existing bookings, select the tick box next to the booking(s) that you would like to edit and make your changes accordingly as shown below.

Removing Existing Bookings
To remove an existing booking, simply change the ‘Booking Status’ to ‘Remove’ as shown below. Bookings that have been removed will not be visible in Rubi and remain in the background for data protection purposes.

Moving Bookings
Users can easily move bookings from one event to another. To move a booking, select the tick box next to the preferred booking and then select the ‘Move’ button in the top right as shown below.

Once selected, search for the event name that you would like to move the booking across to and then select the ‘Go’ button.
Please note: Moving a booking will transfer all data to the new event with existing values. Prices will not be changed and must be updated manually if required.

Cloning Bookings
Existing bookings can be cloned to quickly create additional bookings for a company with the same values such as the payment type, account status and pricing. To clone a booking, tick the box next to the booking that you would like to clone and select the ‘Clone’ button as shown below.

Once selected, enter the number of TBC places that you would like to clone and then select ‘Clone’.

Exporting Booking List
Users can quickly export the booking list for an event directly into MS Excel format. To export a booking list, click the ‘Export to Excel’ button in the top right corner.

SMS & Templates for Bookings
Users can send communications to attendees via SMS and pre-existing templates. Users who wish to use the SMS service will require a live account with Textmarketer.co.uk.
Sending SMS Messages
Users that have their Rubi system connected to Textmarketer.co.uk will have the option to send information to contacts within the bookings list via SMS. Please note that SMS messages are limited 160 characters. SMS messages can be sent immediately or scheduled for a later date. To send an SMS message to attendees, tick the box next to the attendee name(s) and then select the ‘Send SMS’ button.

Once selected, Rubi will open the Send SMS box where the message and schedule can be set. Once completed, click the submit button.

Generating Templates for Bookings
Users can easily generate templates for bookings such as a booking confirmation or cancellation message. Please note that only templates that have been pre-loaded into the Rubi system will appear as an option. Please click here for more information about templates. To send a template for bookings, select the bookings that should receive the message and then click the ‘Generate Template’ button.

Once selected, Rubi will navigate user to the bulk merge area.

Select the interaction service, outcome and method and then select the preferred template.

When the template has been selected, Rubi will populate the ‘Notes’ section with the template details including merge fields.

From this point, users should make any required changes to the template and then choose a sending method.

A preview of the message can be viewed for each attending (prior to sending) by selecting the preview button next to the attendee name.

When a sending method is chosen, Rubi will send the correspondence and save the information as an interaction against the contact’s record.
Event Details
The ‘Event Details’ section can be found in the drop down list of an open event record as shown below. Event Details enables users to add additional information for an event such as short description, long description, cancellation policy and agenda.

Once selected, Rubi will navigate users to the details section for the event.

All sections within the details page are ‘free text’ and can be used as merge fields within templates.
Interactions for Events
Event interactions can be accessed within the drop down menu of an open event record as shown below. Interactions relating to an event are stored within this section and enable users to see what communications have taken place between the organisation and the attendees.

Once selected, Rubi will navigate users to the interactions page where all interactions relating to the event will be listed.
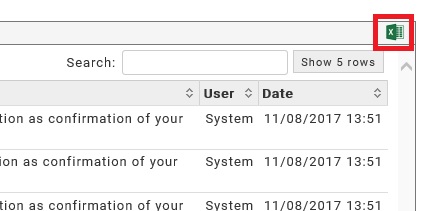
Exporting Event Interactions
Users can easily export event interactions by selecting the ‘Export to Excel’ button in the top right as shown below.
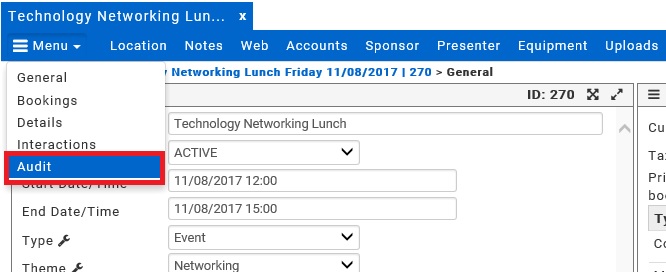
Audit for Events
Audits for events can be accessed within the drop down menu of an event record as shown below. The Audit section records and displays any changes made to an event by all users.
Once selected, Rubi will navigate user to the audit search area as shown below. To view the audit, enter the required date range and click the ‘Apply’ button.

Once selected, Rubi will display an audit trail of any changes that have been made to include the fields that have been updated and the name of the person who made the change(s). Please note that Rubi can only return audit results for a date range of up to 60 days.
Customer-Membership Admin Tool
The Customer or Membership Admin tool is located in the menu bar as shown below. This tool enables users to search for customers or members by dates, sales/pipeline information and offers.

Searching by Date
To search for customers or members by date, select ‘Customers by Date’ or ‘Members by Date’ within the drop down list.

Once selected, Rubi will navigate users to the Customers/Members by Date page. Users can now select to search by joining date, renewal date or date left.

After selecting how to search for customers/members, enter the date range for the search and click apply.

Rubi will now display the results in a grid format below. Further filtering can be applied at this stage by selecting the preferred Sale Service.

Editing Customer/Member Information
Users can easily edit the following fields within this grid: Date Joined, Date Renewal, Amount, Date Left, Representative, Signup, Status and Type. To edit customer/member information, select the tick box next to the preferred records and make changes accordingly. If the columns displayed below are not showing within the grid, check the show/hide columns box to see which columns are active.

Sales/Pipeline Items by Date
Users can easily search for Sales or Pipeline items by date by utilising the ‘Sales/Pipeline’’ function. This option is located within the drop down menu as shown below.

Once selected, Rubi will navigate users to the ‘By Date’ screen as shown below. Enter the preferred date range and the results will be displayed in a grid view.


Cloning Sales/Pipeline Items
Existing Sales/Pipeline items can be cloned to quickly create additional items for a company with the same values. To clone a Sales/Pipeline item, tick the box next to the item that you would like to clone and select the ‘Clone’ button as shown below.

Bulk Membership Update
This function enables users to quickly update customer/membership statuses in bulk from the ‘Sales/Pipeline’ area. To update statuses in bulk, select the tick box next to your preferred item(s) and then select the ‘Bulk Membership Update’ button in the top right as shown below.

Once selected, Rubi will present users with a pop-out window to select a new membership status and date of renewal as shown below. Once selected, click ‘Go’ to save the changes.

Generating Templates
Templates can be generated for existing Sales/Pipeline items to be sent directly to the contact assigned to the item. To generate a template, tick the box next to the item(s) that you would like to generate a template for and then select the ‘Generate Template(s)’ button as shown below.

Offers
Users can easily search for existing offers by expiry date by utilising the ‘Offers’ function. This option is located within the drop down menu as shown below.

Once selected, Rubi will navigate users to the ‘By Date’ screen as shown below. Enter the preferred date range for offer expiry dates, select ‘Apply’ and the results will be displayed in a grid view.
Accounts
The ‘Accounts’ button is located to the right of the ‘Customer’ or ‘Membership’ button within the Rubi menu bar. Users can search and amend existing items that require payment within this section.

All Items to Pay
Sales/Pipeline items that have a value greater than zero, a valid payment type and an ‘Accounts Status’ of ‘To Invoice’ can be located with the search function. To search for items requiring payment, select the ‘All Items to Pay’ button as shown below.

Once selected, users have the option to select all items, bookings, sales/pipeline or international trade documents. Select your preferred view and Rubi will display your items in a grid format.

Add to Basket
To add items to a basket for payment, select the tick box next to the item(s) that you would like to process and then select the ‘Add to basket’ button in the top right as shown below.

Once selected, Rubi will add the selected item(s) to the basket as shown below. To process, enter the information within the required fields and select ‘Go’

Find Items
In this section, users can search and further process sales/pipeline, bookings and international trade documents that have been added for payment processing within Rubi. Users can view the current status of payments (Added to Rubi2Sage queue), update items with payments receipts and remove items from queue. Partial payments against items can also be recorded and added to the Rubi2Sage queue.

Once selected, enter the preferred date range and click ‘Apply’.

Payments for Items
Users can update existing items once they have been processed from the Rubi2Sage queue and have a status of ‘invoiced’. At this point users can process full or partial payments for items. To process a full or partial payment, tick the ‘Pay’ box next to the order you would like to amend and then select the ‘Action selected items’ option as shown below.

Once selected, complete the required fields and select ‘Go’ to process the payment and update the order.
Removing Orders
Orders that have a status of ‘Added to Queue’ can be easily removed. To remove an order, select the ‘x’ button beneath the reference number.
Items Check
Within this section, users can search for any items that require payment that have not been assigned a payment type or an accounts status. Items Check can be found in the drop down menu as shown below.

Once selected, enter the preferred date range and Rubi will display all items that require payment and have missing statuses. Users can update the missing fields from this section so that the item can be processed normally.
PO Requests
All PO Requests submitted as an ‘Interaction’ within Rubi can be easily accessed within this section. Purchase Order Requests can be found in the drop down menu as shown below.

Searching PO Requests
To search for PO Requests, search for the preferred date range and Rubi will display the items within a grid.
Processing PO Requests
PO Requests can be assigned a PO Number and marked as ‘Actioned’. To assign a PO Number to a PO Request, enter the assigned PO Number as shown below and then tick as ‘Actioned’. Once the actioned button is selected, the user that requested the PO number will receive an alert confirming the PO is complete.

Card Payments
The Card Payments section lists an overview of card payments that have been processed via Rubi or your linked website.
Rubi2Sage Queue
The Rubi2Sage Queue outlines all items that are currently in the queue for processing. This area should be checked on a regular basis to confirm that all information being sent across to Sage has been completed correctly e.g. all sale services are allocated with an accurate nominal code.
Marketing
The ‘Marketing’ button is located to the right of the ‘Accounts’ button within the Rubi menu bar. Users can manage templates, reports, imports and MailChimp functions within this section.

Templates
Templates can be accessed within the drop down menu as shown below.

Once selected Rubi will navigate users to the ‘Templates’ page as shown below. All exisiting templates will be displayed in alphabetical order.

Creating Templates
To create a new template, enter the name of the template within the ‘Name’ field as shown below. Once the new template name has been saved, the new template will be added to the existing list of templates in alphabetical order.

Viewing Templates
To view a template, select the ‘View template’ button as shown below.

Once selected, Rubi will open the selected template in a preview format to the right of the templates list to include all merge fields.

Removing Templates
Templates can be easily removed by changing the template name to ‘Remove’. Once entered, Rubi will permanently remove the template from the list.

Editing Templates
To edit a template, simply make the required changes within the template preview window and select the ‘Save’ button when complete.

Word Documents as Templates
Users can create and upload Word documents to be used as a template for PDF and printed documents. It is recommended that users create the text for Word templates within the Rubi template builder. This provides users the ability to select the required Rubi merge fields to be added to the Word template document.
Creating Text for Word Templates
To create the text for the Word template, add the text within the template preview window and include any select the required merge fields from the Rubi drop down list as shown below.

Once the template is created, copy and paste the information into the MS Word document. When the final edits are completed within Word (to include preferred formatting) save and close the document then attach to the template as described below.
Uploading Word Documents
To upload a Word document for a template, select the ‘Upload New Word Doc’ button as shown below.

When the file is uploaded, the template will display an MS Word icon to the right of the template name. Users will now have the option to select the Word version of the template to be printed or converted to PDF format.
Reports
Reports can be created and saved within Rubi system utilising the built-in Reporting tool. The Reporting tool can be found in the drop down list as shown below.

Once selected, Rubi will navigate users to the reporting tool.

Building Reports
To build a report, select the required values from the ‘Report Values’ list located on the left side. Values are grouped with expandable headers to assist users when searching for specific values. For example, if you require the ‘Company Name’ as a value, simply expand the ‘General’ header and select either ‘Output’ or ‘Filter’ to add this as an output column or filter setting.

Deleting Output Columns
To delete an output column from the report, select the ‘Remove’ button as shown below.

Moving Output Columns
Users can easily move output columns by clicking on the value and dragging to a new position. This action will ensure the data is exported with the columns in the preferred order.
Adding Filters to Reports
To add a filter to a report, select the required value as ‘Filter’ and Rubi will display the filtered value(s) within the ‘Filters’ area.
Once the filter has been added, further options can be applied for the filter by selecting ‘Select options’ within the filter box. Select the ‘Save filter’ option to save the filter. Please note that filters that have not been saved will not be added as part of the search criteria.

Running Reports
Once the report values are in place, select ‘Run Report’ in the options box in the bottom left of the Reporting tool.

Once selected, Rubi will run the report with the required values and export the information directly into an Excel document. To access the report, click on the Excel icon.
Saving Reports
Reports that have been created within the Reporting tool can be saved within Rubi for quick access in the future. To save a report, select the ‘Save Report’ option in the bottom left of the Reporting tool. Once selected, enter the report name, description and locking preference. Reports that are marked as ‘locked’ can only be edited by the user that created the report or a System Administrator.

Loading Saved Reports
Saved reports can be quickly loaded within the Reporting tool and within the ‘Saved Reports’ section of Tools in Rubi. For more information on saved reports within tools click here. To load a saved report within the reporting tool, select ‘Load Report’ within the options box.

Cloning Reports
Saved reports can be easily cloned to save time when creating new reports with similar values. To clone a report, select the ‘Load Report’ option and then select the ‘Clone this report’ button next to the preferred report.

Deleting Reports
Reports that are ‘unlocked’ can be deleted by any Rubi user who has access to the reporting tool. Reports that are ‘locked’ can only be deleted by the user that created the report or a System Administrator. To delete a report, select the ‘Load Report’ button and then select the ‘Delete this report’ button next to the report that you would like to remove.

Imports
The Imports Tool can be found in the drop down list as shown below. The built in Import Tool enables users to quickly add or update information such as ‘new records’ or ‘interactions’ in bulk.

Once selected, users can select which type of import to be completed.

Importing New Records
Users can easily import new records in bulk into Rubi. To import new records, select the ‘New Records’ option from the imports menu. Once selected, Rubi will navigate users to the ‘Import – New Records’ screen as shown below.

Please note that users must import new records with the CMIS-UK base import document. The base import document is available to download via the link shown below.

Once the import document has been downloaded, the data to be imported should be added to the document in the correct columns. Once complete, the document should be saved and uploaded by selecting the ‘Choose File’ button.
Importing Interactions
Users can import interactions in bulk for contacts that currently exist within the Rubi system by using the Import Interactions tool. The Import Interactions tool can be found in the drop down list as shown below.

Once selected, Rubi will navigate users to the Import Interactions page as shown below. Users should download the base interactions spreadsheet and populate the required columns. Reports can be run to obtain the required Company and Contact ID’s in advance of the bulk import. Once the document is completed it should be saved.

After the base import document is saved, users can select a service, method, outcome, method, user name, date and notes for the bulk interactions. A maximum of 1000 characters can be added within the notes box. Users can opt to upload a notes (.txt) file instead of populating the notes section and there is no character limit for these file types. To complete the import, select the ‘Continue’ button and upload the saved base import document.
Importing Contact Interests
Users can import specific contact interests in bulk for contacts that currently exist within the Rubi system by using the Import Contact Interests tool. The Import Contacts Interests tool can be found in the drop down list as shown below.

Once selected, Rubi will navigate users to the Import Contact Interests tool.

Please note that users must import new records with the CMIS-UK base import document. The base import document is available to download via the link shown below. Users should download the base import spreadsheet and populate the required columns. Once completed, the document should be saved. Only contact interests that currently exist within the ‘Contact Interest’ list can be added for contacts. For more information about system lists please click here.

When the base import document is ready, click the ‘Choose File’ button to complete the import.
Bulk Email Remove
Users can remove email addresses in bulk for specific contact records that exist within Rubi. For example, if you discover that several email addresses have bounced back during a MailChimp campaign, you can utilise the bulk email remove feature to remove multiple incorrect email addresses. The Bulk Email Remove tool can be found in the drop down list as shown below.

Once selected, Rubi will navigate users to the bulk email remove page. The base email remove import document should be downloaded and populated accordingly. Once the document has been saved, users should select ‘Choose File’ to complete the import.

Import Amount Owed
Users can update the ‘Amount Owed’ value in bulk for companies that currently exist within the Rubi system. The Bulk Amount Owed tool can be found in the drop down list as shown below.

Once selected, Rubi will navigate users to the amount owed bulk import tool.

Users should download a copy of the amount owed import document and populate the columns accordingly. Once complete, the document should be saved and uploaded by selecting ‘Choose File’.
Bulk Update Company Records
Company records that currently exist in Rubi can be updated in bulk by using the bulk update routine. The bulk update tool can be found in the drop down menu as shown below.

Once selected, Rubi will navigate users to the update companies bulk import page.

Users who wish to update company records in bulk should first run a report that includes the following output columns to obtain the company records to be updated:
CompanyGUID, Company, CompanyTel, TelCountryCode, CompanyFax, CompanyEmail, CompanyWeb, CompanyIndividual, Address1, Address2, Address3, Address4, County, Postcode and Country.
Additional output columns can also be added but the above columns must be included. When the report is ready, users should download a copy of the base import spreadsheet via the link shown below.

Once the import document has been downloaded, company information should be copied from the report and added to the correct columns. When the base import document is ready, select the ‘Choose File’ option to upload and complete the import/update.
Records within the Rubi system will be updated with ALL values from the uploaded import document to include blank values. Please ensure you are only removing data which is incorrect as CMIS-UK cannot be held responsible for data that has been imported in error.
Import TradeCert Information
Import TradeCert function is for CMIS-UK customers who utilise TradeCert to process international trade documents. This feature enables users to quickly add international trade documents in bulk for records that currently exist within the Rubi system. The Import TradeCert tool can be found in the drop down list as shown below.

Once selected, Rubi will navigate users to the TradeCert import page.

Users should now download the base import spreadsheet provided and populate the columns with the TradeCert specific information. Please note that TradeCert will need to be contacted in order to obtain the required TradeCert specific data. Customers who require assistance with TradeCert documents should contact the CMIS-UK Support Team at +44 (0)113 322 6555 or at support@cmis-uk.co.uk for more information.
When the base import document is ready, select the ‘Choose File’ option to complete the upload.
MailChimp
Rubi can be linked to an existing MailChimp account to enable users to quickly update MailChimp subscription lists. For more information on how to add a MailChimp account to Rubi, click here. The MailChimp integration tool can be found in the drop down list as shown below.

Once selected, Rubi will navigate users to the MailChimp integration tool.

If Rubi is linked to a MailChimp account Rubi will display all of the current saved reports and MailChimp subscription lists.

Sending Data to MailChimp Subscription Lists
To send data from a saved Rubi report to an existing MailChimp subscription list, select the preferred report and list to be updated. Once selected, click the ‘Load Results’ button.

Once the load results button has been selected, Rubi will load the results of the report and display the contacts.

Select the record(s) that you would like to send to your saved MailChimp subscription list by ticking the box next to the preferred record(s). Once selected, click on the ‘Send to list’ button.
Generating Interactions for MailChimp
Users can generate interactions for in bulk within the MailChimp integration tool. To generate interactions for your contacts, tick the box next to the contact(s) that you would like to generate interactions for and then select the ‘Generate Interactions’ button. Once selected, a pop-out window will appear to enable users to add more information about the interaction.

When the details of the interaction have been added, click the submit button.
Mailchimp Subscription List Cleaning
The MailChimp subscription list cleaning tool enables you to quickly update contact email addresses will be updated in your MailChimp subscription lists. This applies to changes made to any contact email address within Rubi or via any Rubi web integration. The old email address (in MailChimp) will be updated to the new email address logged in Rubi. Contacts marked as ‘Do Not Contact’ or ‘Left’ will be removed from your MailChimp subscription lists. Contacts associated with Company records marked as “Deactivated” will also be removed from your MailChimp subscription lists.
Please Note: Changes to Contact Interests are not included with this feature. The cleaning action can be performed either on an individual subscription list or against all subscription lists. Performing this action against all subscription lists may take some time to complete. Prior to running this new feature, if you would like a list of items that will be cleaned in your MailChimp lists during initial run, please contact support@cmis-uk.co.uk.
MailChimp List Cleaning – Single Subscription List
To action a clean-up on an individual subscription list, select your Rubi MailChimp report and the subscription list as normal. Once selected, you will now see a button labelled ‘Cleanup Lists’ as shown below.

Once the option is selected, follow the prompts to initiate the clean-up of your single MailChimp Subscription list.
MailChimp List Cleaning – Multiple Subscription Lists
To action a clean-up on multiple subscription lists, select the ‘MailChimp List Cleanup’ button within your MailChimp Lists box.
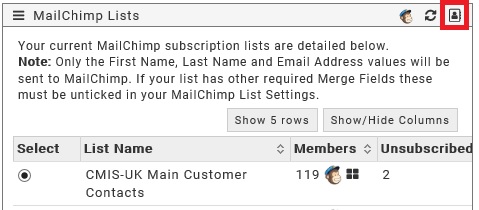
Once selected, follow the prompts to initiate the clean-up of all of your MailChimp Subscription lists.
Questions?
Please contact us with any questions you may have on +44 (0)113 322 6555 or at support@cmis-uk.co.uk
ForFront
Rubi can be linked to an existing ForFront account to enable users to quickly update existing ForFront group lists. For more information on how to add a ForFront account to Rubi, click here. The ForFront integration tool can be found in the drop down list as shown below.

Once selected, Rubi will navigate users to the ForFront integration tool.

If Rubi is linked to a ForFront account Rubi will display all of the current saved reports and ForFront group lists.

Sending Data to ForFront Groups
To send data from a saved Rubi report to an existing ForFront Group, select the preferred report and group to be updated. Once selected, click the ‘Load Results’ button.
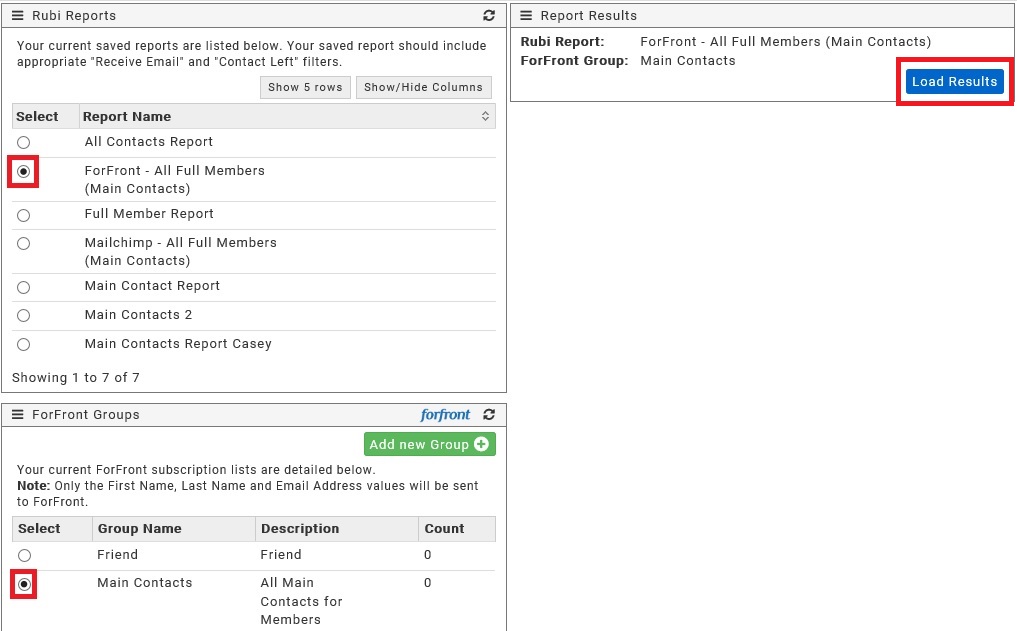
Once the load results button has been selected, Rubi will load the results of the report and display the contacts.
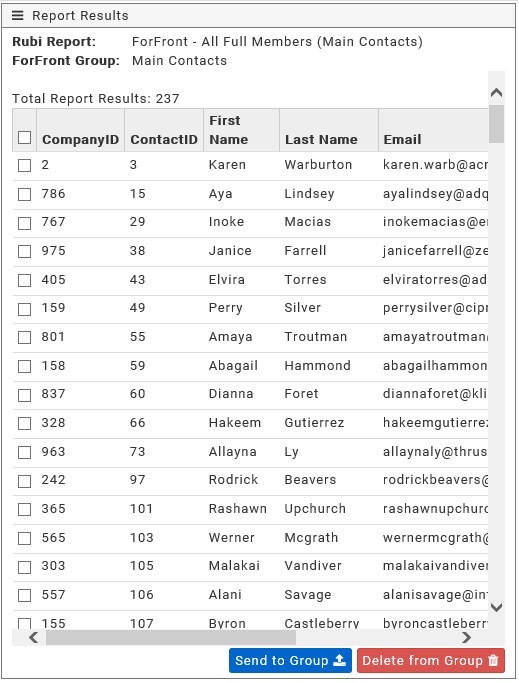
Select the record(s) that you would like to send to your saved ForFront group by ticking the box next to the preferred record(s). Once selected, click on the ‘Send to Group’ button.
Bulk Contact Tool
The Bulk Contact Tool enables users to easily generate emails or letters in bulk for existing contacts within Rubi. Emails and letters generated via the Bulk Contact Tool can be created utilising existing templates or manually created by typing into the HTML editor. The bulk contact tool can be found in the Marketing drop down list as shown below.

Once selected, Rubi will navigate users to the Bulk Contact Page.

To add contacts to the Bulk Contact tool, users can either upload a list within Excel or individually select contacts within Rubi.
Adding Contacts (Excel List)
To add contacts to the Bulk Contact tool via an Excel list, users must upload an Excel document with the following completed columns: CompanyGUID, Company Name, ContactGUID and ContactFullName. These values can be generated as part of a report built within the reporting tool. Please click here for more information about building reports.
Once the Excel document is in place, users should select the ‘Upload List’ option as shown below. When the document has been uploaded, all contacts will appear in the bulk contact list.

Adding Contacts (Contact Record)
Contacts can be individually added to the Bulk Contact tool by selecting the ‘Add to Bulk Contact list’ button within an individual contact record (shown below). Multiple contacts from various companies can be added to the list by repeating this process.

Once the contacts have been added to the Bulk Contact tool, users can then select the Service, Method and Outcome to add an interaction against the individual contact records.

At this point, users can opt to link the interactions to an existing event or just select a template from the drop down list. Once a template has been selected, Rubi will display the template with the merge fields on the right hand side.

At this point the template can be further amended and a preview of each template (with the merge fields completed) can be found next to the contact name as shown below.

When the template is ready to be sent or printed, users should select the required option as shown below.

Rubi System Settings
The System button is located to the right of Marketing within the Rubi menu bar. Within this area System Administrators and Users with the appropriate permissions can manage Rubi User Accounts, amend Rubi system settings and log support tickets to the CMIS-UK Support Team.

Rubi User Accounts
System Administrators and Users with the appropriate security permissions and can easily manage Rubi User accounts. The Rubi Users section can be found in the drop down list as shown below.
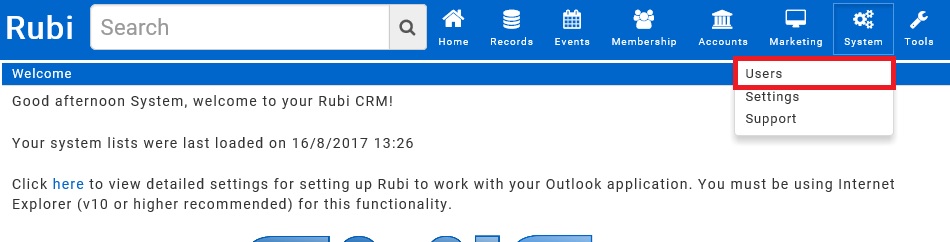
Once selected, Rubi will navigate users to the User Administration tool. If the Rubi User has a department assigned within the profile, the user account will be listed in the appropriate departmental folder. If no department has been for the user, the account will appear in ‘No Folder Set’.
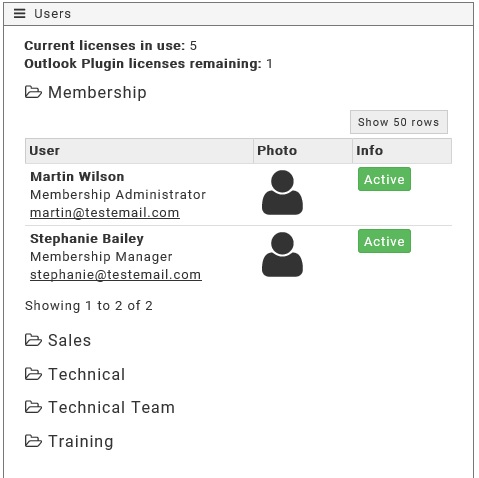
Adding Rubi User Accounts
To add a new Rubi Account, select the ‘Add New User’ button as shown below.

Once selected, Rubi will open a pop-out window to enable users to add the new user account information. Please note that passwords must contain a minimum of 8 characters to be accepted by Rubi.
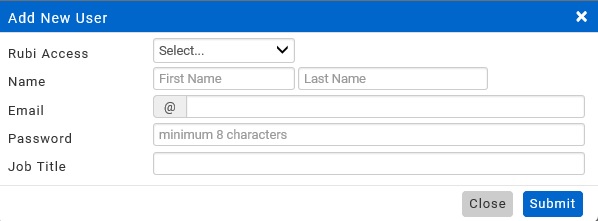
Once the new account information has been added, select the ‘Submit’ button.
Removing Rubi User Accounts
To remove a Rubi User account, click on the name of the account you wish to deactivate and then change Rubi Access from ‘Yes’ to ‘No’. This action will deactivate the user account preventing future access to Rubi.

Amending Rubi User Accounts
To amend a Rubi User Account, click on the name of the user you wish to edit. Once selected, Rubi will open the full profile for the user to include the General, Permissions, Photo and SMTP Email settings sections.
General Section
The ‘General’ section of a Rubi user’s profile contains basic information such as Rubi Access Status, Name, Email, Job Title, Telephone, Status, Date of Birth and Emergency contact information.

Photo Section
The ‘Photo’ section of a Rubi user’s profile enables users to upload photos to the Rubi user profile. Photos are displayed within the user list of the Rubi system. To upload a photo, simply select the ‘Upload User Image’ button as shown below.

User Security Permissions
The ‘Permissions’ area of a Rubi user’s account acts as a control panel for System Administrators to lock down or permit access to specific areas of the Rubi system.

If a permission is set to a green button with the word ‘Yes’, access is granted for that specific permission. If a permission is set to a red button with the word ‘No’, access has been denied for that permission. To change a permission setting, simply click the button next to the permission setting you would like to change. Please click here to download a copy of the permission list settings.
SMTP Email Settings
Users who do not utilise MS Outlook for emails can link their Rubi account to an alternative email service. To set up an email provider, complete the details within the SMTP Email settings section as shown below.

Viewing User Tasks & Alerts
To view a Rubi User’s tasks and alerts, select the ‘User Task/Alerts’ button as shown below.

Once selected, type the name of the user you wish to view tasks and alerts for and then select a date range.

Viewing User Audits
To view a complete list of all changes made by a specific Rubi user, select the ‘User Audit’ button as shown below.

Once selected, type the name of the user that you wish to view the audit for and then select a date range.

Rubi System Settings
System Administrators and users with the appropriate security permissions can customise Rubi system settings. Users can access System Settings within the drop down menu as shown below.

Once selected, Rubi will navigate users to the System Settings area which contains system settings, system lists, custom fields, custom box, membership rates and the welcome screen message area.
System Settings
The Rubi System Settings section enables users (with appropriate security permissions) to further customise the system with settings that are specific to organisations. Details such as card payment provider and basic company information can be amended within this section. Please click here to download a full list of system settings that includes a detailed explanation of each setting field.

System Lists
All customisable lists within Rubi are located witin the System Lists section. Users can easily manage these customisable lists by selecting a list to amend.

Once selected, Rubi will open the customisable list where changes can be applied.

Setting Default Values
Users can assign default values for Sale Service and International Trade Documents within the ‘Sale Service’ list. Items that have been assigned a default value will automatically populate with the correct value and savings (if applicable) when added to the Sales Pipeline or International Trade Documentation section of a company or contact record. To assign a default value to a Sale Service or International Trade Document, select the ‘Sale Service’ or ‘International Trade Document Type’ option from the System List.


Once selected, Rubi will open the list where values can be assigned to specific Sales or International Trade Items.

Customised Fields
Additional fields can be added to Rubi within the Company General, Customer/Membership, Contact General and Event General sections. Customised fields can be in free text, date, hyperlink, multi line, multi select, numeric, selection or yes/no format.

Adding Customised Fields
To add a customised field, select the drop down list for the page or section that you would like to add the custom field. For example, if you would like to add a new custom field within the ‘Company’ page, select the drop down list that is labelled ‘Custom_Company’ as shown below and then choose ‘Company’.

Once selected, enter the name of your new custom field within the ‘Label’ box as shown below.

Next, select the custom field type using the drop down list to the right and then select the order number. Once completed, click out of the field and the new custom field will appear in the preferred area as shown below.

Removing Customised Fields
To remove a customised field, select ‘Reset’ within the drop down list as shown below. This action will remove the custom field and all data from the set page or section.

Membership Rates
Rubi can store default values for CMIS-UK customers who manage memberships and membership rates. Rates are set based on the number of employees per organisation as shown below. To assign default membership rates add the employee range and value to the appropriate fields. Once complete, Rubi will automatically assign the matching membership rate value within the ‘Membership Amount’ field based on number of employees entered for each organisation.

Welcome Screen Message
System Administrators can customise the welcome screen message within system settings. The Welcome Screen Message is the first screen that all users see upon logging into Rubi. To edit this area, simply type the message and select ‘tab’ on your keyboard or click out of the area to save your changes.

Support
Rubi has a built-in Support Tool that enables all users to log technical issues directly with the CMIS-UK Technical Support Team. The Support Tool can be accessed in the drop down list as shown below.

Once selected, Rubi will navigate users to the Support Ticket screen where users can detail any issues experienced.

Once complete, select the blue ‘Submit’ button in the bottom right. The request for support will immediately be sent to the Technical Support Team for review and response. Customers may also contact CMIS-UK directly at support@cmis-uk.co.uk or +44 (0)113 322 6555 for further assistance.
Tools
The ‘Tools’ button is located to the right of the ‘System’ button within the Rubi menu bar. Users can access tools such as Users List, Documents, Calendar, Calculator Saved Reports and the Rubi Help Centre.
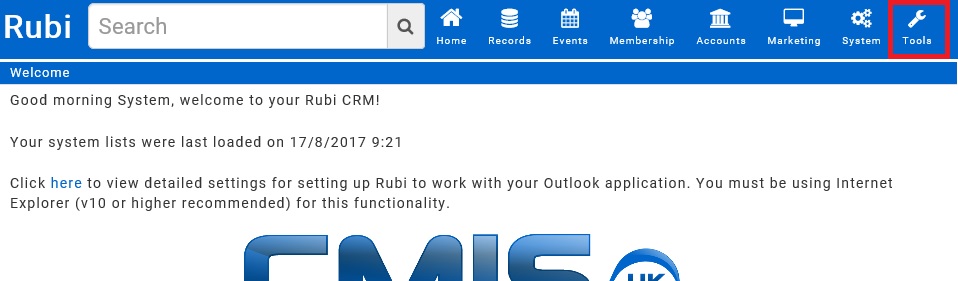
Rubi User List
A full list of Rubi Users can be found within the User List section within tools. The User List can be accessed within the drop down list as shown below.

Once selected, Rubi will navigate users to the full list of Rubi users as shown below.

Each Rubi user is listed in alphabetical order and filed in the relevant departmental folder (if a folder has been set for the user). System Admininstrators can be identified by the System Admin label as shown below.
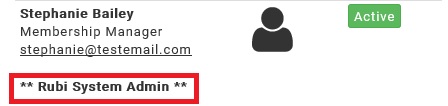
System Administrators have access to amend individual accounts from this section. All other users will only have viewing rights within the Rubi User List area. For more information on managing system users, please click here.
Documents
Users have the ability to upload files into the Documents folder which can be accessed in the future and sent as as attachments through interactions. The Documents section can be found in the drop down list as shown below.

Once selected, Rubi will navigate users to the Documents folder and display all previously uploaded files. Files that have been allocated a folder name will appear in the relevant folder in alphabetical order. Files that have not been allocated a folder can be found in ‘No folder set’.
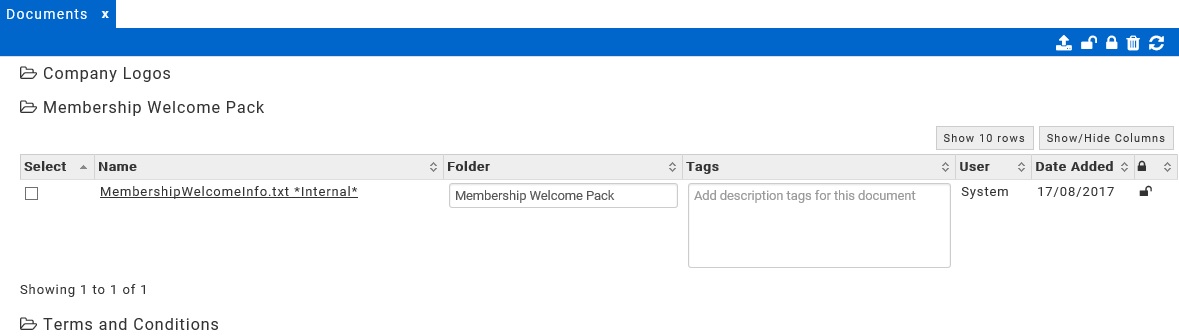
Uploading New Files
To add a new file to Documents, select the ‘Add new document’ button.

Once selected, a pop-up window will open and users can upload files by selecting the ‘Browse’ button.
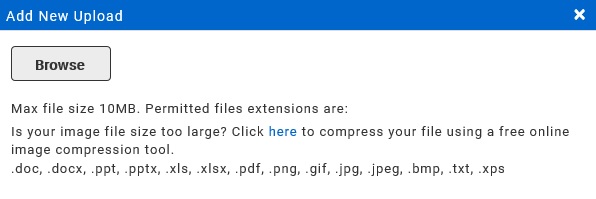
Deleting Files
To delete a file, tick the box next to the file(s) you would like to delete and select the ‘Remove selected document(s)’ button as shown below.

Unlocked Files
Files that are marked as unlocked can be accessed by any Rubi user with an active Rubi Account.
Locked Files
Files that are marked as locked can only be accessed by System Administrators, Users with Uploads Admin permissions or by the user that uploaded the file.
Calculator
Users can access the built-in calculator tool by selecting the ‘Calculator’ option within the drop down list.

Once selected, Rubi will open the calculator tool in a new window.

Calendar
Users can access the built-in calendar tool by selecting the ‘Calendar’ option within the drop down list.

Once selected, Rubi will open the calendar tool in a new window.

Saved Reports
Users can build and save reports within the reporting tool. For more information about building reports please click here. Once the report is saved, users can quickly run the the report at any time within the Saved Reports tool. To access saved reports, select the ‘Saved Reports’ option in the drop down list as shown below.

Once selected, Rubi will navigate users to the Saved Reports tool. Reports which have been allocated a folder will be filed accordingly. Reports that have not been allocated a folder will appear in ‘No Folder Set’.

View Results
Users can quickly view results for saved reports by selecting the ‘View results’ button next to the preferred report name as shown below.

Once selected, Rubi will run the report (with the predetermined search values) and return the most up to date results within the browser.

Export to Excel
Users can quickly export results for saved reports directly into Excel by selecting the underlined report name as shown below.

Once selected, Rubi will run the report (with the predetermined search values) and export the results to Excel.
Tasks & Alerts
The ‘Tasks & Alerts’ section is located to the left of the ‘Social’ button within the Rubi menu bar. All outstanding alerts and tasks for a user can be accessed in this section.
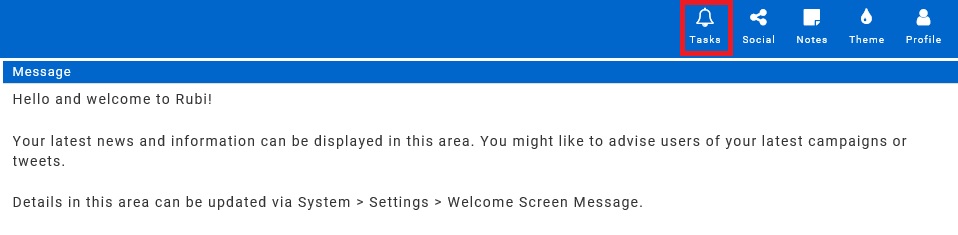
Setting Tasks
Users can can set tasks for themselves as part of an interaction as a reminder to action an outstanding item with a contact. For more information about setting tasks please click here. Once the task has been set, a notification will appear within the Task & Alert section as shown below.

Viewing Tasks
To view an outstanding task, click on the task summary as shown below.

Once selected, Rubi will navigate the user to the original interaction as shown below.

Marking Tasks as Complete
To mark a task as complete, tick the box next to ‘Complete’ within the interaction or select the ‘Completed’ button within the preview as shown below. Once the task has been marked as complete, the notification will disappear from the Task & Alert section.


Receiving Alerts
Alerts are received from other Rubi Users as part of an interaction. For more information about sending alerts to other Rubi Users please click here. Once the alert is received, a notification will appear within the Task & Alert section and an email will be received notifiying the user of the alert.
Viewing Alerts
To view an outstanding alert, click on the alert summary as shown below.

Once selected, Rubi will navigate the user to the original interaction as shown below.

Marking Alerts as Complete
To mark an alert as complete, tick the box next to ‘Complete’ within the interaction or select the ‘Completed’ button within the preview as shown below. Once the alert has been marked as complete, the notification will disappear from the Task & Alert section.


Rubi User Profile
The ‘Profile’ button is located to the right of the ‘Theme’ button within the Rubi menu bar. Users can access and amend their Rubi account information within this section.

Once selected, Rubi will open the Rubi User Profile page where changes can be applied.

Changing Passwords
To change your Rubi login password, select the ‘Change Password’ option as shown below.

Once selected, Rubi will open a pop-out window where the new password details can be entered.

Themes
Users can use the theme tool to choose an alternative colour for their Rubi system theme. The ‘Rubi Theme’ button is located to the left of the ‘Profile’ button within the Rubi menu bar.

Once selected, Rubi will present the theme colour options.

Notes
The ‘Notes’ button is located on the right side of ‘Social’ in the Rubi Menu bar. Users can create free text notes with this tool to serve as a reminder for a specific task or other notes.

Creating Notes
To create a note, select the ‘Note’ button and type the note into the field and select the ‘Submit’ button.

Deleting Notes
To delete a note, select the ‘Delete’ button.
Rubi Tips
Rubi has many built-in features that make managing customer and member data easy. In this section, we are pleased to provide you with additional information about some of the add-on services available with the Rubi CRM. Some of the key features outlined in this section include:
- Rubi Outlook Plugin
- Rubi Data Protection Portal (RDPP) – GDPR Compliant
- Event Bookings Email Scheduler
- Event Check-In Function
- Rubi Custom Pages & Boxes
Rubi Outlook Plugin
The updated Rubi Outlook Plugin allows access to MS Outlook (in a Windows environment) from any browser that Rubi is accessed.
Once connected, the plugin will enable users to:
- Send emails as part of an interaction from Rubi to Outlook
- Import emails from Outlook to a Rubi Interaction allowing addition of extra notes
- Export emails as an interaction directly from Outlook
- Open an email in Outlook to view basic Company information held in Rubi relating to the email sender/recipient
Please click to watch a demonstration video of the Rubi Outlook Plugin
Rubi Data Protection Portal
The new GDPR (General Data Protection Regulation) is due to come into effect from 25th May 2018. Organisations worldwide that process the personal data of EU residents have only a short time to ensure that they are compliant with the new regulation. In order to assist our new and existing customers with this regulation, we are pleased to announce the arrival of the Rubi Data Protection Portal (RDPP).
The RDPP is a web based Rubi add-on that can be easily added to your website, email signatures, e-marketing campaigns and other locations. The RDPP can be accessed by any contact in your Rubi system with an email address.
Once accessed, the portal enables your contacts to:
- Provide consent to your organisation to retain their personal information
- View current personal information held on them within your Rubi system
- Update their personal details held within your Rubi system (once consent has been obtained)
- Amend communication and marketing/interest preferences
- Submit a request to exercise their Right to be Forgotten or “Right to Erasure”
All changes made by contacts within the RDPP will be tracked in real time within your Rubi system. This enables your organisation to retain accurate records for your contacts in accordance with the GDPR.
Please click here to watch a demonstration video of the Rubi Data Protection Portal
Social Media Favourites
The ‘Social Favourites’ button is located to the right of the ‘Tasks & Alerts’ button within the Rubi menu bar. Users can quickly access their favourite company or individual contact social media sites in this section.
Once selected, Rubi will present users with all of the social media links that have been ticked as a favourite. To visit the site, click on the link name.